Frequently Asked Question
How do I set up Google Meet?
Last Updated 6 years ago
Video Tutorial Link
1. You can create a Google Meet from your laptop by logging into your email at mail.bhmsd.org. We strongly recommend using Google Chrome.
2. In the top right corner, click on the Google Apps Menu
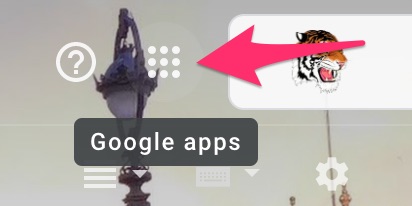
3. Click on Meet (Note: Your apps may be in a different order)
4. You will see the Google Meet screen that has the following information. Click on “Join or start a meeting.”
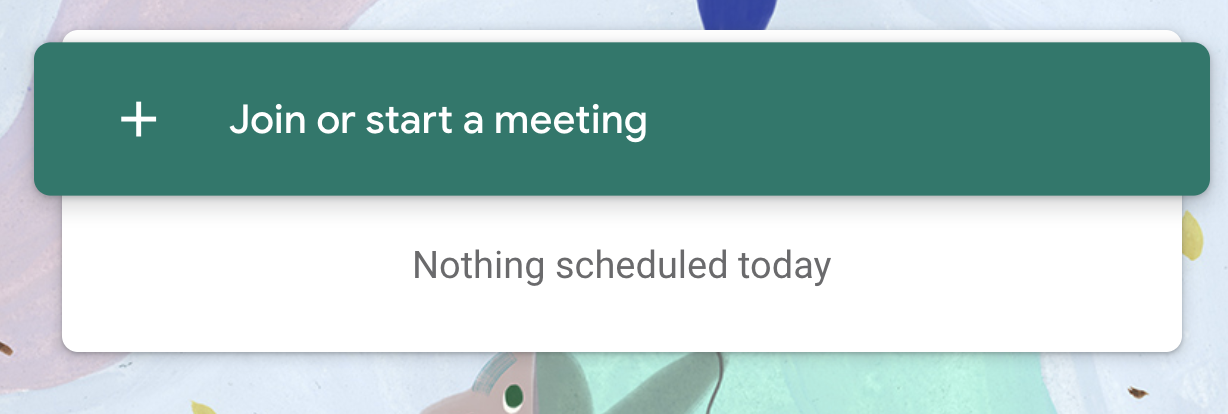
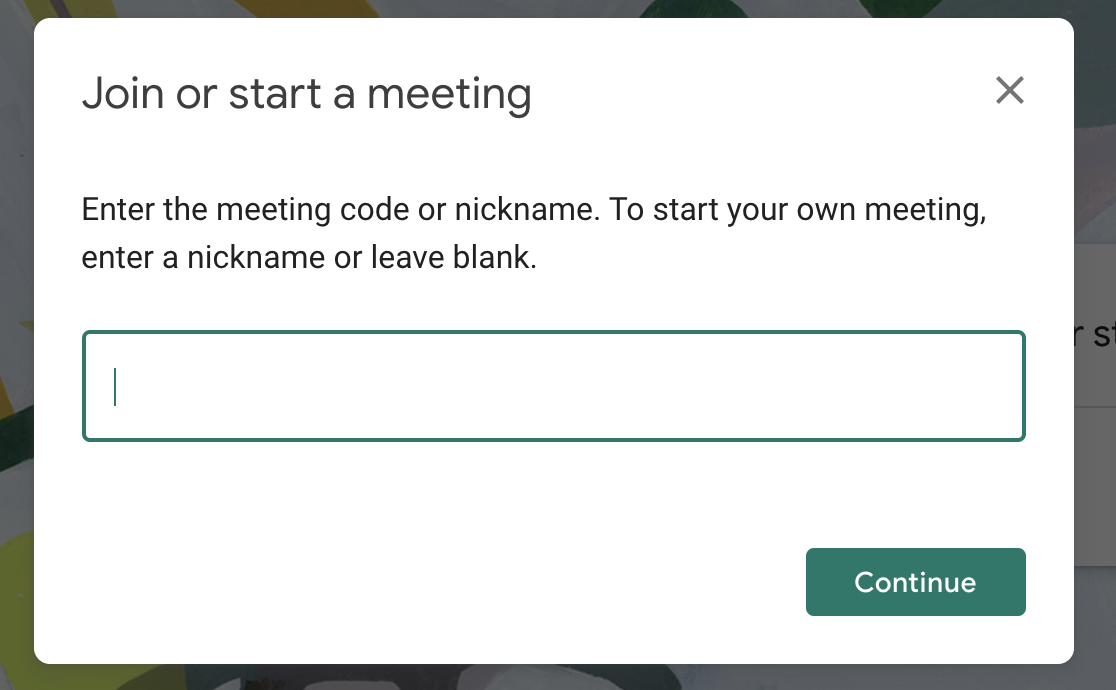
5. Next you will see this screen. You can leave this blank and just hit “Continue.”
6. You will now have to allow Google to have access to your camera and microphone. Click on allow in the top left to grant access. Once you hit that, the middle window will disappear.
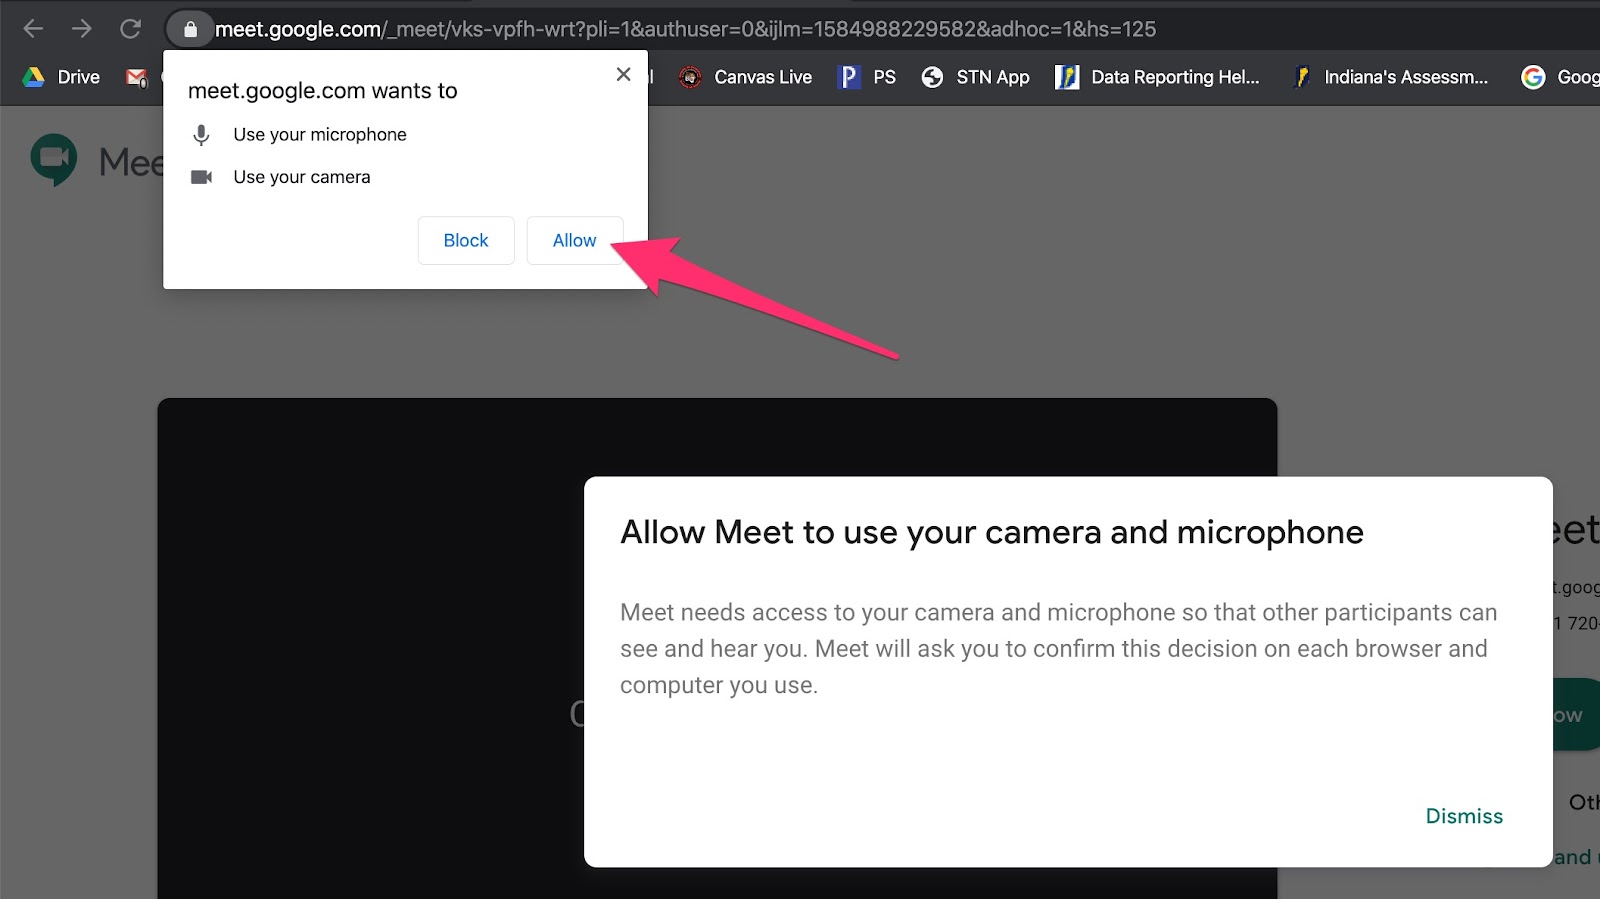
7. You MAY get the following two popups the first time you run a Google Meet on your computer. If these come up, hit OK for both of them.
8. Once you have granted your computer and Chrome access to your microphone and camera, you should see the “Meeting Ready” screen. You can click “Join now”
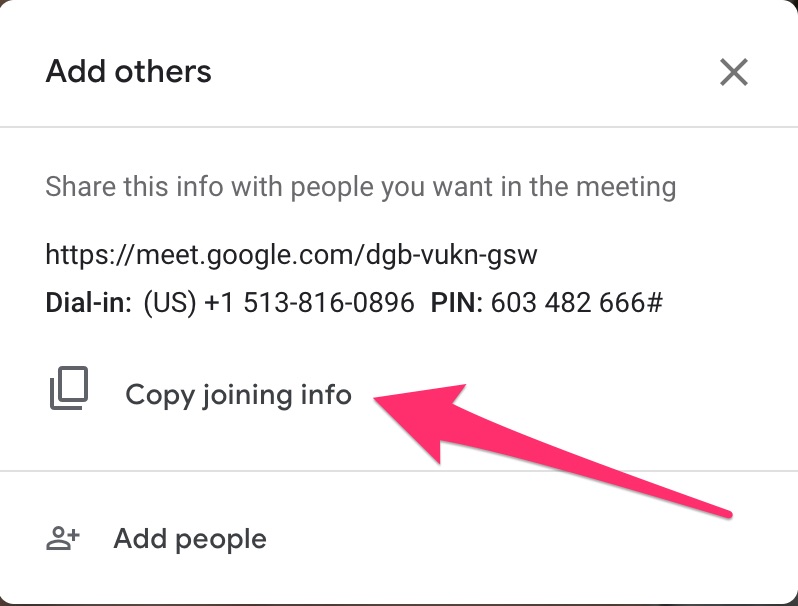
9. After selecting “Join now”, you will see the information to add others to your meeting. The easiest thing to do would be to hit “Copy joining info” and paste this into Canvas or send an email to your students with the link to join the meeting.
10.You should now have the meeting running. At the bottom of the screen in the middle are your basic controls. On the left (Microphone Icon) is the control to mute your microphone, in the middle (Phone Icon) is how you leave the meeting, and on the right (Camera Icon) is how you turn off your camera
11. At the bottom of the screen on the right side are more advanced controls. You can click the “Present” button at the bottom right to present what is on your computer screen. You can select to either broadcast your entire screen, or a window.

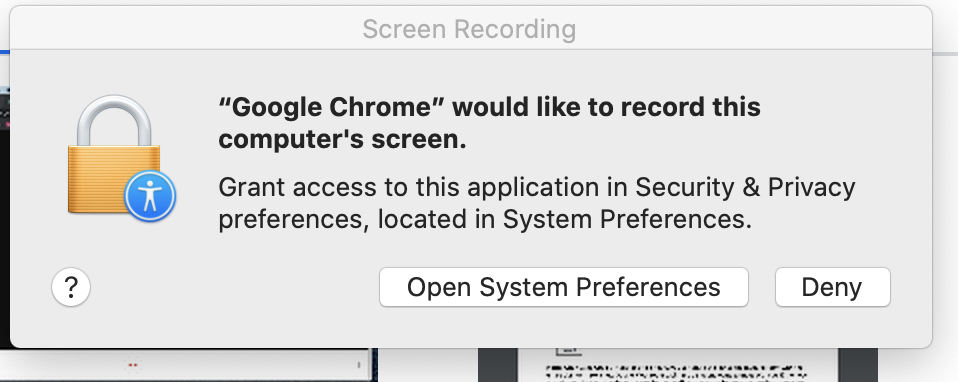
12. You may be prompted for allowing access to Google Chrome to record your screen as shown below. If you, you need to click “Open System Preferences”
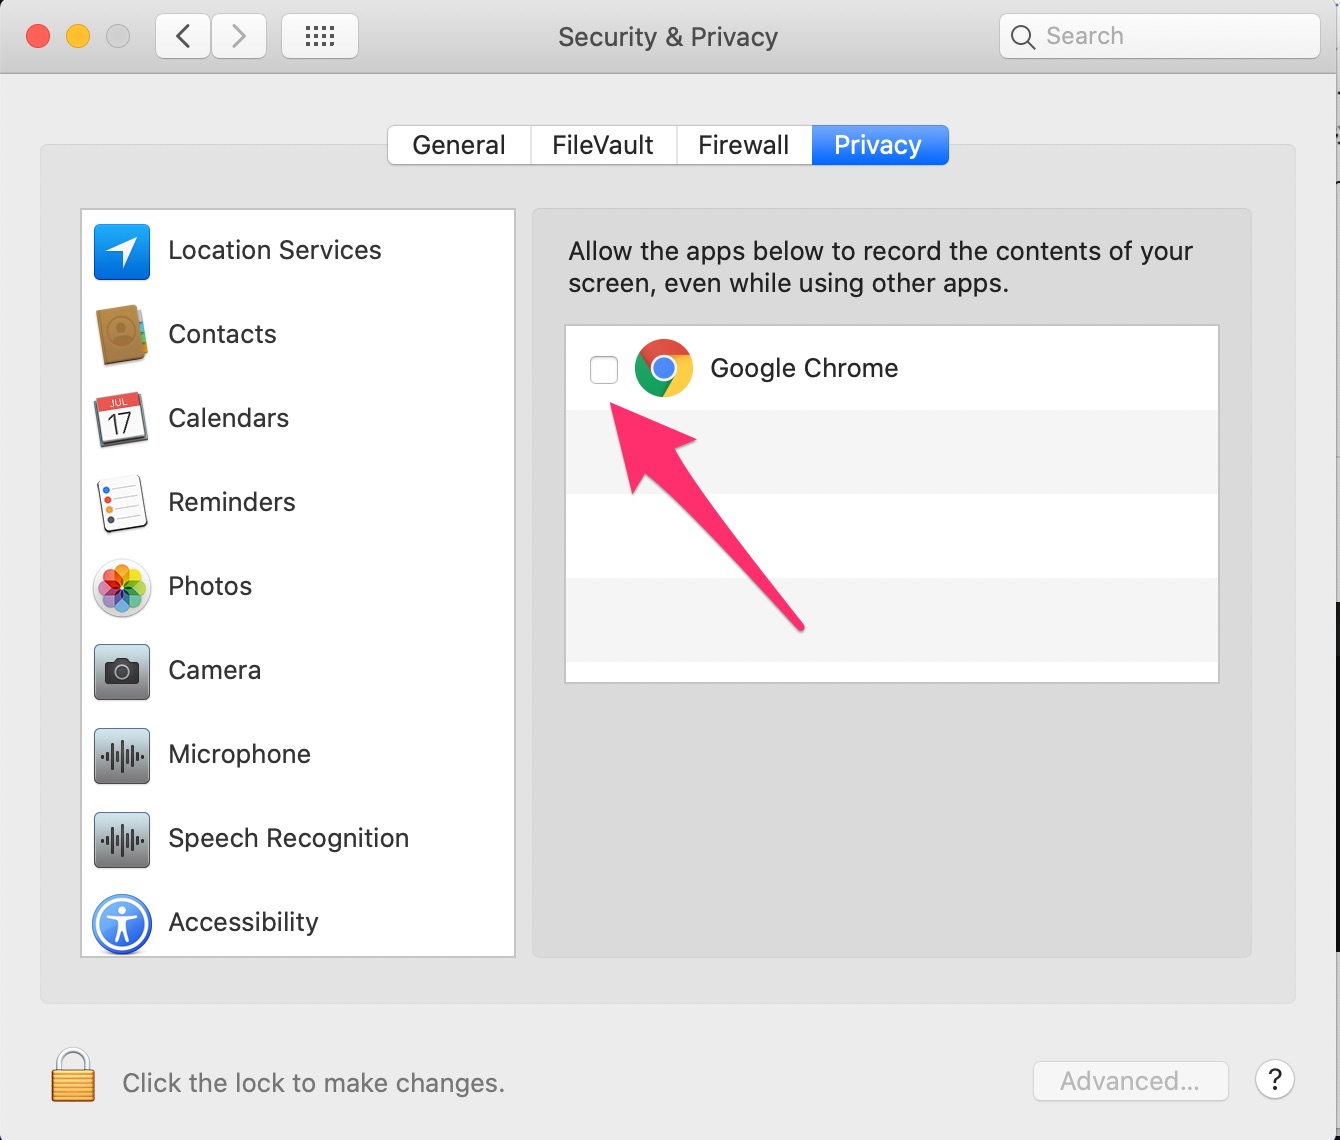
13. You will see the following screen open up. Check the box for Google Chrome
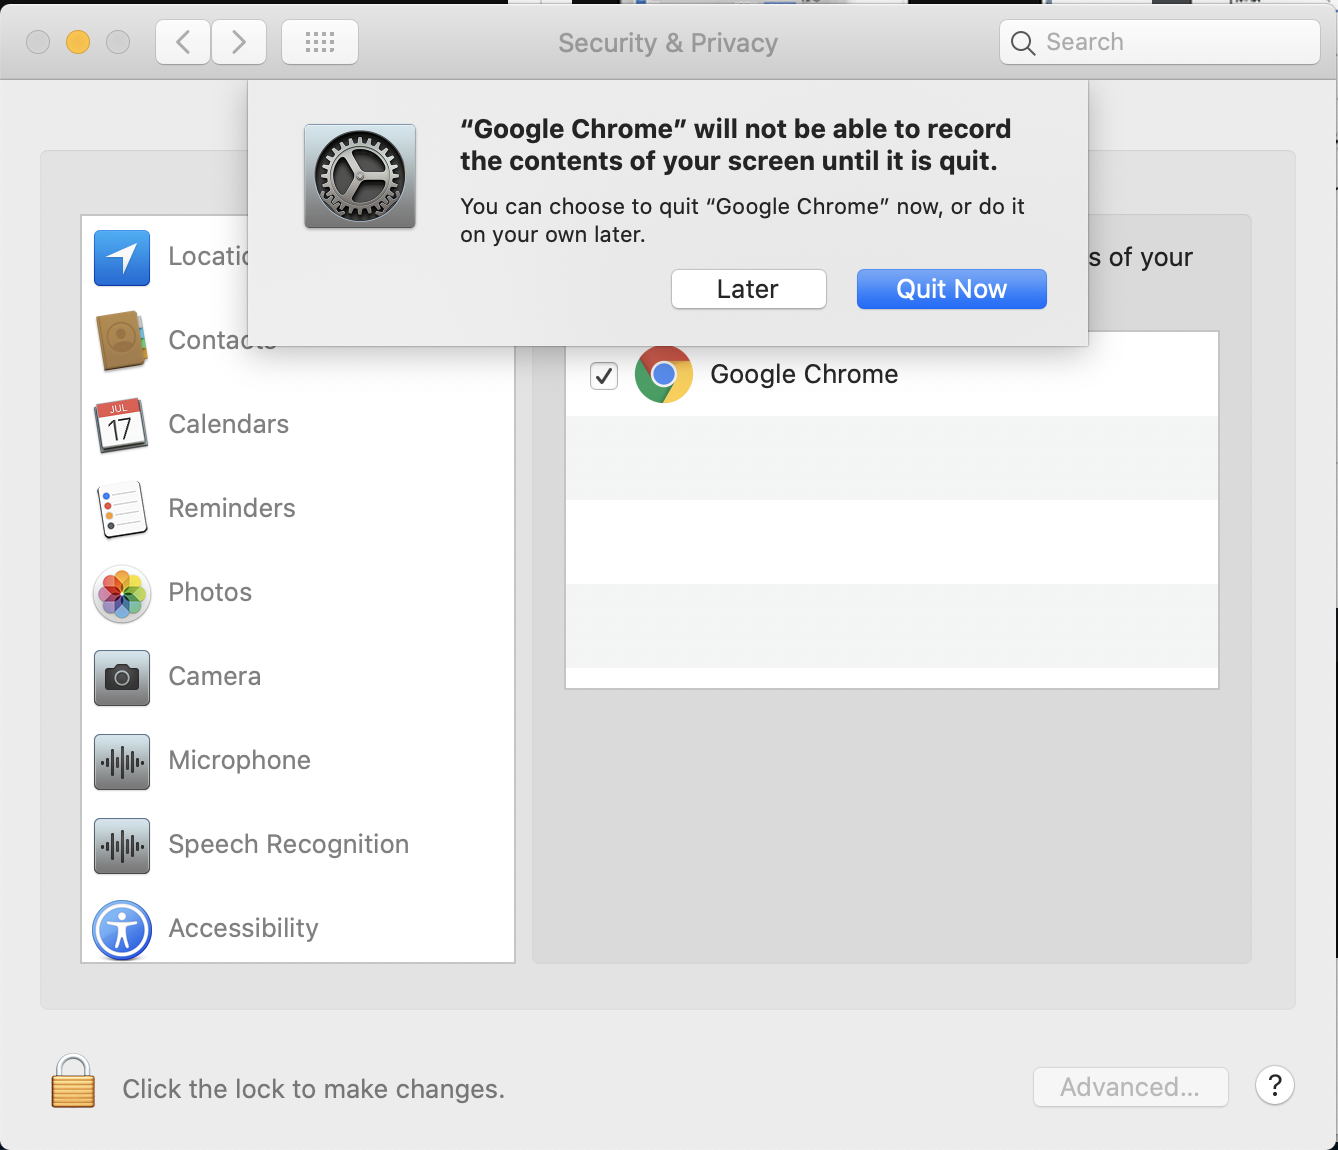
14. After checking the box, you will get the following message. If you are not going to record your meeting, I would select “Later”, otherwise you will have to start all over. If you want to record the meeting, select “Quit Now” and after Chrome quits, go back to Step #1.
1. You can create a Google Meet from your laptop by logging into your email at mail.bhmsd.org. We strongly recommend using Google Chrome.
2. In the top right corner, click on the Google Apps Menu
3. Click on Meet (Note: Your apps may be in a different order)
4. You will see the Google Meet screen that has the following information. Click on “Join or start a meeting.”
5. Next you will see this screen. You can leave this blank and just hit “Continue.”
6. You will now have to allow Google to have access to your camera and microphone. Click on allow in the top left to grant access. Once you hit that, the middle window will disappear.
7. You MAY get the following two popups the first time you run a Google Meet on your computer. If these come up, hit OK for both of them.
8. Once you have granted your computer and Chrome access to your microphone and camera, you should see the “Meeting Ready” screen. You can click “Join now”
9. After selecting “Join now”, you will see the information to add others to your meeting. The easiest thing to do would be to hit “Copy joining info” and paste this into Canvas or send an email to your students with the link to join the meeting.
10.You should now have the meeting running. At the bottom of the screen in the middle are your basic controls. On the left (Microphone Icon) is the control to mute your microphone, in the middle (Phone Icon) is how you leave the meeting, and on the right (Camera Icon) is how you turn off your camera
11. At the bottom of the screen on the right side are more advanced controls. You can click the “Present” button at the bottom right to present what is on your computer screen. You can select to either broadcast your entire screen, or a window.
12. You may be prompted for allowing access to Google Chrome to record your screen as shown below. If you, you need to click “Open System Preferences”
13. You will see the following screen open up. Check the box for Google Chrome
14. After checking the box, you will get the following message. If you are not going to record your meeting, I would select “Later”, otherwise you will have to start all over. If you want to record the meeting, select “Quit Now” and after Chrome quits, go back to Step #1.